Cross-Platform Development With .NET Core
Prologue
.NET Core is a free, open-source and cross-platform framework for building modern apps and powerful cloud services. It is a relatively young framework, but I think it has unlimited potential. Unlike it brother .NET Framework, who can only run on Windows, we can use .NET Core for cross-platform developments, and the first one to come into our mind is probably the Web server.
In this article, I’m going to talk about how to publish Linux application built with .NET Core.
1. Get .NET Environment
The ultimate IDE for .NET development is, without doubt, Visual Studio! Of course, Rider of JetBrains is also great, so we can install ReSharper as a Visual Studio extension to boost your productivity.
Visual Studio will take care of .NET SDK and runtime for us on Windows, so all we need is to install .NET runtime on the target machine. Or, you can also choose to bundle the runtime with your application later in the Configure Publish Profile.
For installation, Microsoft gives good docs: Install .NET on Windows, Linux, and macOS.
Take Ubuntu 20.04 as example. First, you need Microsoft package repository.
1 | wget https://packages.microsoft.com/config/ubuntu/20.04/packages-microsoft-prod.deb -O packages-microsoft-prod.deb |
Different release may have different version number or commands! Do refer to the official documentation. 🥺
Then, you can use package management to get .NET stuffs. If you simply want to run your application on Linux, there’s no need for .NET SDK. If you want to run ASP.NET Core web application, you also need ASP.NET Core runtime.
1 | sudo apt update |
2. Publish Application via FTP
Visual Studio provides us one-click publish to remote server, but here I’ll only show you how to to this with FTP. So first, you need to Setup FTP on Ubuntu. With FTP enabled, we can now add publish profile for our project.
2.1 Create Publish Profile
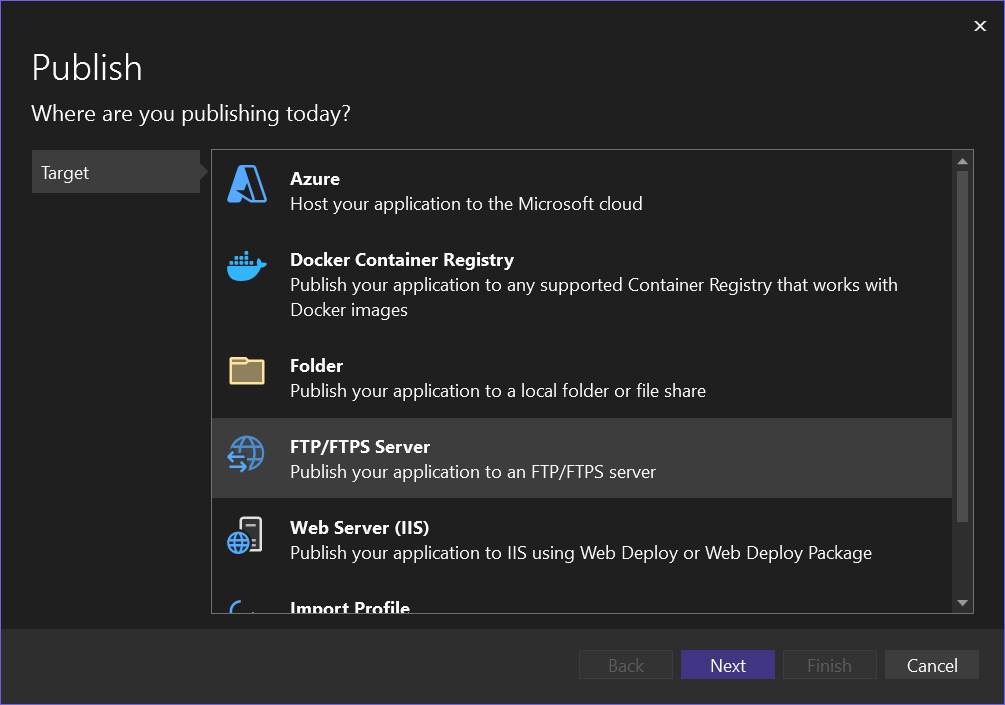
To create a new publish profile, or publish your application, right click on the solution, and select “Publish…”.
If you don’t yet has any, create one, and select “FTP/FTPS Server”.
Then, you just need to set the IP and credentials of your server. For “Site path”, although starting with /, it is in fact the relative path to the FTP root of the user you configured on the server, so don’t write absolute path here.
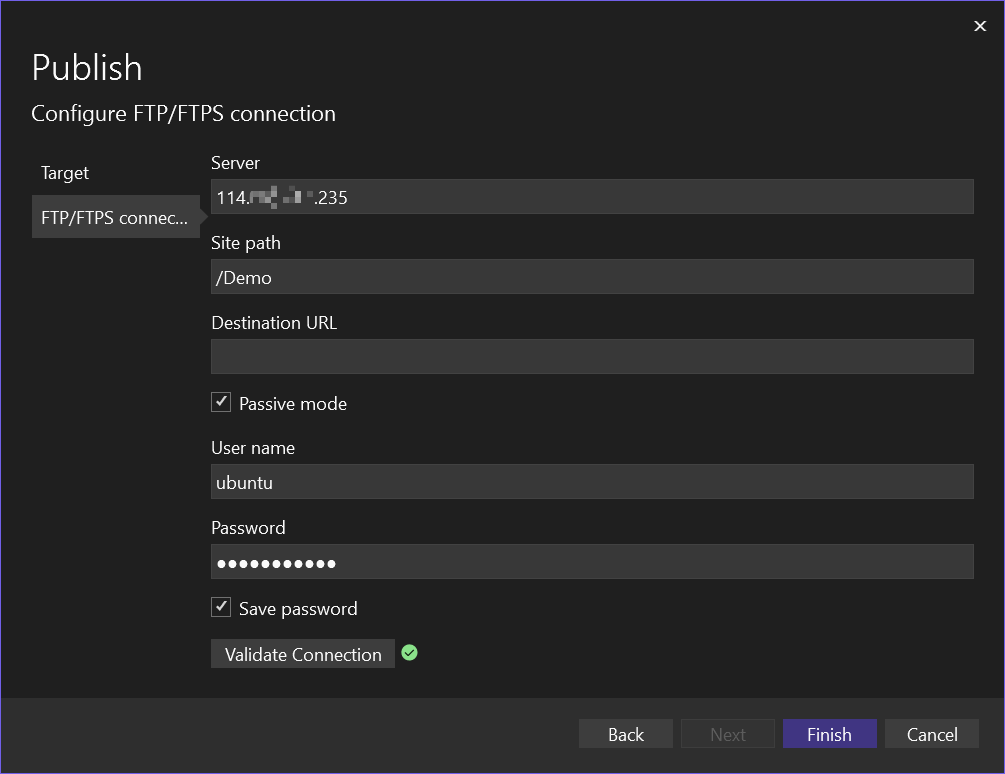
“Passive mode” may not work that well. Just uncheck it if something went wrong.
2.2 Configure Publish Profile
Click “Show all settings” in the publish profile, so that we can customize our publish properties. Just choose them depends on your project.
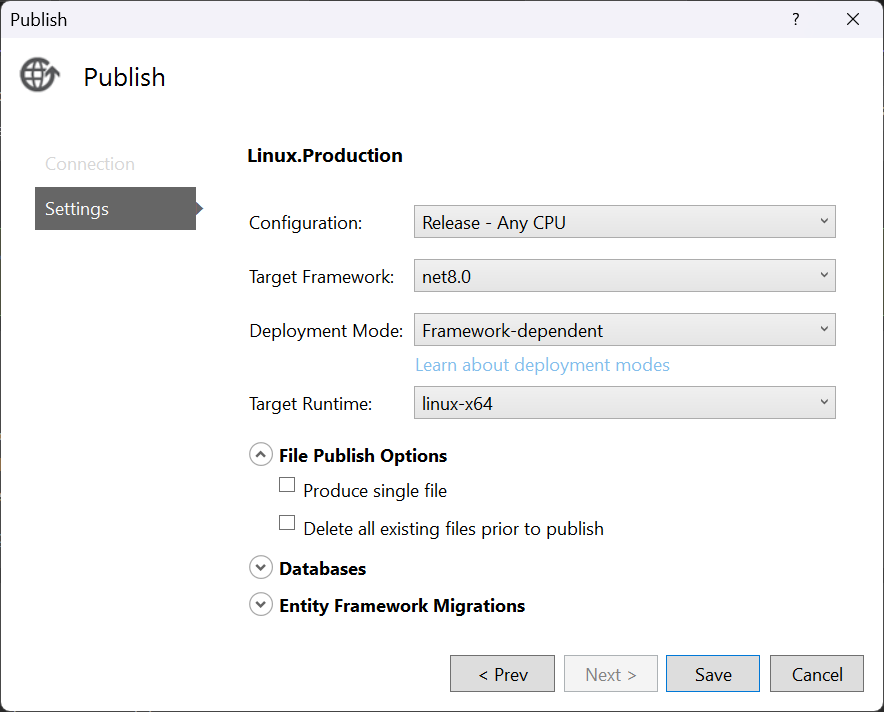
One thing to notice is the “Deployment Mode”. If you’ve installed runtime on your remote server, it is better to select “Framework-dependent” to reduce size. Otherwise, you should select “Self-contained” to include the runtime in your application.
If you select a specific CPU (e.g. x64), it must match the target machine, or publish will “succeed”, but nothing will be published.
One small tip for this. In “File Publish Options”, uncheck both options. In most cases there’s no need to create a single file, so uncheck it to reduce compile time. Also, you don’t need to delete existing, or previous files if the output files won’t change. It brings much convenience as you won’t need to use chmod to grant permission for the executable.
Epilogue
Well, have to say, Visual Studio is awesome, so is .NET. 😆
 WeChat


